
When I'm having a rough day, I like to bake something. It takes time, keeps my mind busy, and when I'm done I have something delicious to nom on. When my boyfriend moved two states away, I decided to cheer myself up by baking a cake. A regular cake was too easy, though. I needed something...more. It was time to make a rainbow cake.
You will need:
- white or yellow cake batter
- six extra bowls
- food coloring
Make your cake batter as you normally would. You can use your favorite recipe, or even a box mix. I used a new recipe and was disappointed by the results :(. I will research my recipes more carefully next time.
Next comes the different part. You are going to separate your cake batter into the six bowls. The tricky part is that you are not going to have the same amount of batter in each bowl! To achieve the rainbow stripey effect, you will need more red batter, slightly less orange batter, slightly less yellow batter, and so on until you end up with only a little bit of purple batter. So you will need to add more batter to one bowl, and less in the other bowls, with one bowl only containing a little bit of batter. Does that make sense? You will see how this works when you start laying the batter.

You should end up with varying amount of batter in six different bowls. It does not have to be perfect.

Next comes the food coloring. You are going to add dye until you have created a rainbow of batter. Add as much dye as you like to color the batter.

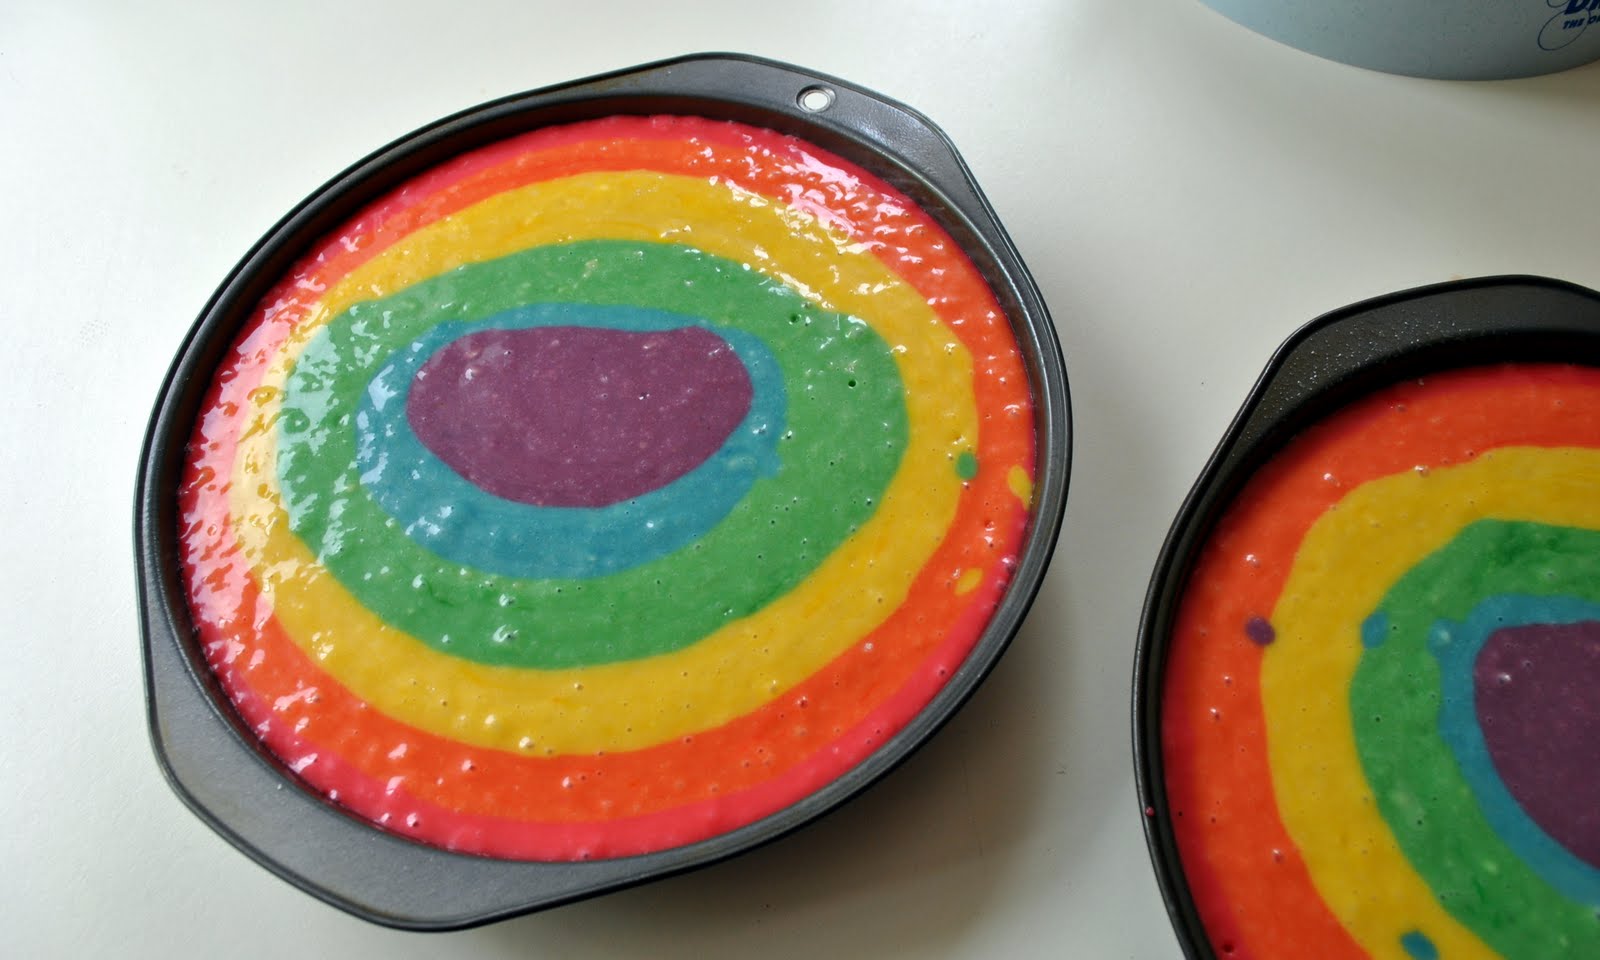
Now comes the layering. First, pour in the red batter. If you are making two layers like I did, then be sure to split your batter equally between the two pans. After the red batter is in, you will pour your orange batter in the center of the red batter. Don't try to spread it out, just leave it in the middle. Next comes yellow. Again, pour it in the center. Keep adding batter to the center until you end up with a lovely bulls eye pattern. Pretty!
Bake as you normally would, and tada! Rainbow cake!

Once your cakes are cooled, you can frost and assemble the layers. You can frost your cakes with any frosting you like, but I like the idea of having an unassuming frosting disguising the happy rainbow cake inside. I tried out a chocolate peanut butter frosting from the book The Joy of Vegan Baking, by Colleen Patrick-Goudreau. I am so glad I did, because this was the most delicious frosting ever. Mine was a little bit different than the book. I didn't add any salt or vanilla, and I didn't have any nondairy milk or natural peanut butter on hand, but it still turned out great. Here's what I did:
Chocolate Peanut Butter Frosting (adapted from The Joy of Vegan Baking)
- 1/2 cup peanut butter
- 1/3 cup cocoa powder
- 1/2 cup milk
- 2 1/2 cups powdered sugar
Mix ingredients with electric mixer until smooth. Try not to eat too much before it makes it onto the cake.

Get ready to layer your cake. I had to cut the tops off of my later because they rose pretty high. Pour some frosting onto one layer.

Top with the other layer.

Frost away.

Eat your rainbow cake and feel happier!
No comments:
Post a Comment